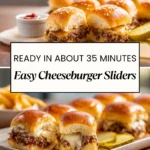
Cheeseburger Sliders That Stay Juicy for a Crowd
The first thing you notice with these Cheeseburger Sliders isn’t the look — it’s the smell. Beef hitting a hot pan, mustard and Worcestershire caramelizing, onions picking up just enough char. Then they come out of the oven with the tops toasted, cheese fully melted, and that soft-buttery roll giving slightly when you press down. That combination is what makes people hover around the baking dish before you even slice them.
These sliders were designed as juicy party food, not dainty appetizers. They’re meant to be hearty, a little messy, and dependable when you’re feeding several people at once. Instead of forming individual patties and guessing doneness, everything is cooked and seasoned first, then assembled in a way that lets the flavors meld together while baking. That’s what keeps the beef moist and the buns from going limp halfway through serving.
What I like most about this recipe is how repeatable it is. The timing is realistic, the ingredient list is practical, and the method works the same way whether you’re making them for a game night or a casual family gathering. These Cheeseburger Sliders are built so the beef stays juicy, the cheese melts evenly, and every bite tastes like a real cheeseburger — just scaled for sharing.
Table of Contents
Ingredients (And Why Each One Matters)
Ground Beef
Lean ground beef works best here because the sliders bake together in one pan. Too much fat can make the bottom soggy, while lean beef still stays juicy thanks to the mustard and Worcestershire. I stick with standard grocery-store ground beef — no need for specialty blends.
Yellow or Red Onion
Thinly sliced onions are cooked until lightly charred, not softened into mush. That bit of browning adds depth and keeps the sliders from tasting flat. Don’t skip this step or substitute raw onions — it changes the whole balance.
Hawaiian Sweet Rolls
These are non-negotiable. The slight sweetness balances the salty beef and cheese, and the texture holds up during baking. Regular dinner rolls tend to dry out or fall apart once sliced.
American Cheese
This is one place where the “cheap” option is actually the best option. American cheese melts smoothly and creates a proper cheeseburger texture. Fancy cheeses don’t melt as evenly in this format.
Shredded Cheddar
Cheddar adds sharpness and flavor that American cheese alone can’t provide. Pre-shredded is fine here since it’s being melted into a hot filling, not used as a topping.
Dill Pickles
Pickles cut through the richness and keep the sliders from feeling heavy. Thin slices work best so they don’t overpower the beef.
Burger Sauce Ingredients
Mayonnaise, ketchup, relish, and mustard come together into a sauce that’s familiar but balanced. This isn’t optional — it adds moisture and ties everything together without making the sliders soggy.
Butter or Olive Oil & Sesame Seeds
A light brush of fat helps the tops toast evenly, and the sesame seeds give you that classic burger bun finish. It’s a small detail, but it makes the sliders feel complete.

How These Cheeseburger Sliders Come Together
Browning for Flavor Before Anything Hits the Oven
This recipe starts on the stovetop for a reason. When the pan is hot enough, the onions should sizzle the moment they touch the surface and smell slightly sweet after a minute or two. You’re not looking for soft, pale onions here — watch for browned edges and small charred spots. That browning is where the depth comes from, and you can hear it in the sharper, drier sizzle as the moisture cooks off.
The beef goes into the same pan while it’s still hot. As you break it up, listen for that steady crackle and watch for deep brown patches forming before you stir too much. The mustard and Worcestershire should darken slightly and smell savory, almost toasted. When done right, the beef feels moist but not greasy when you press it with a spoon, and the pan shouldn’t be swimming in fat.

Building Layers That Bake Evenly
Once the rolls are split, the bottom half should feel soft but sturdy, not crumbly. Laying the American cheese down first creates a barrier — you’ll see it start to soften from the residual heat of the beef later, which helps protect the bread underneath.
When you layer the onions and beef, aim for even coverage rather than height. You should be able to see the beef mixture spread flat across the rolls. As the shredded cheddar goes on, it should sit loosely, not packed down. When the sliders bake covered, the smell turns rich and cheesy; uncovered, the tops should look glossy from the butter and feel lightly crisp when you tap them with your fingertip.

Finishing with Heat Control, Not Guesswork
Covering the sliders at first traps steam, which melts the cheese and warms the center without drying the bread. You’ll hear almost no sound at this stage — just quiet heat doing its job. Once uncovered, listen closely. The tops should begin to crackle slightly as they toast, and the smell shifts from buttery to lightly nutty.
When done, the tops should feel firm but not hard, and the cheese inside should pull slightly when you lift a roll. That balance only happens when the oven temperature stays steady and the timing isn’t rushed.

Where Cheeseburger Sliders Usually Go Wrong
When the Beef Is Cooked Too Fast
If the beef is rushed over low heat, it turns gray and steams instead of browning. You’ll notice a flat smell and a soft, almost mushy texture when stirred. That lack of browning carries through the whole dish, no matter how good the sauce is. High heat at the start is what prevents this.
When the Rolls Turn Soggy
Soggy bottoms usually come from excess fat or skipping the cheese layer on the bottom rolls. If the bread feels damp when sliced, it’s a sign the beef wasn’t drained properly or the assembly order was off. The bottom cheese layer should look melted and fused to the bread, not watery.
When the Tops Brown Before the Inside Is Ready
This happens when the sliders bake uncovered too early. The tops will look golden, but the center cheese won’t be fully melted, and the sliders won’t hold together. You’ll feel resistance when pulling them apart instead of that soft, cohesive pull. Covering first solves this every time.
When Cheeseburger Sliders Lose Their Juiciness
Overbaking dries out the beef quickly in a layered recipe like this. If the sliders feel stiff when pressed and the cheese looks oily instead of creamy, they’ve stayed in the oven too long. Pull them as soon as the tops are toasted and the center is fully melted — they’ll finish settling as they rest.
Make It Your Own
Pepper Jack & Pickled Jalapeño
If you want heat that actually tastes like something, swap half the cheddar for block pepper jack and replace the dill pickles with thinly sliced pickled jalapeños. Use the slices, not the rings, so they sit flat and don’t push the layers apart. The heat comes through slowly, and you’ll smell a faint peppery note as the cheese melts — that’s when it’s right.
Mushroom Swiss Style
This works only if the mushrooms are cooked properly first. Use sliced cremini mushrooms and cook them until all the moisture is gone and they smell nutty, not raw. Swiss cheese melts smoothly here, but keep the American cheese on the bottom layer or the sliders won’t hold together. The texture should feel soft and juicy, not slippery.
Smash-Style Beef Blend
For a deeper beef flavor, use an 80/20 grind but cook it longer until most of the fat renders out. You’ll hear a sharper sizzle as the moisture cooks off and see darker brown bits forming. Drain well before assembling or the buns will soften too much. This version tastes richer but needs more attention to balance.
Gluten-Free Sliders
Gluten-free rolls tend to be denser and dry faster. Toast both cut sides lightly before assembling so they don’t absorb moisture. When baked, they should feel crisp on the outside but soft inside. Skip overfilling — gluten-free bread can’t handle heavy layers.
Serving & Storing in Real Life
I serve these hot and freshly sliced, straight from the pan, with the burger sauce on the side. That way, the buns stay intact, and people can dip as much or as little as they want. When they’re fresh, the tops feel lightly crisp, the cheese stretches slightly, and the beef stays juicy even after sitting out for a bit.
For leftovers, let the sliders cool completely before storing. Slice them before refrigerating so you’re not fighting cold bread later. Store in an airtight container for up to three days. If freezing, wrap individual sliders tightly, and freeze sliced frozen slabs of bread, which are nearly impossible to separate cleanly.
To reheat, the oven or air fryer works best. The air fryer, for a couple of minutes,s brings back the toasted tops and warms the center without drying the beef. The microwave will soften everything, so use it only if texture doesn’t matter.
These Cheeseburger Sliders work because the details are handled before they hit the oven — from the browned beef to the layered assembly. When done right, they smell like a real burger, eat like one, and disappear just as fast.
Get inspired with more mouthwatering recipes! Follow me on Pinterest for new cooking ideas every week.
Frequently Asked Questions
Can I assemble these cheeseburger sliders ahead of time?
Yes, but stop before baking. Cook the onions and beef, let them cool, then assemble the sliders without brushing the tops. Cover tightly and refrigerate up to 24 hours. Bake just before serving so the buns toast properly instead of steaming.
Why not cook the beef directly in the oven?
Because you lose control over browning. Browning the beef on the stovetop creates flavor you can see, smell, and taste. Oven-cooked beef tends to steam, which leads to a softer texture and less savory depth in the finished sliders.
Can I use a different type of roll?
You can, but expect different results. Hawaiian rolls stay soft inside while toasting on top. Standard dinner rolls dry out faster, and brioche tends to collapse under the filling. If you substitute, lightly toast the cut sides first to help them hold up.
How do I keep the sliders from falling apart when slicing?
Let them rest for a few minutes after baking. The cheese needs time to set slightly. If you slice immediately, the layers slide. A sharp serrated knife and a straight-down cut work better than sawing back and forth.
What’s the best way to reheat leftovers?
An air fryer or oven is best. A few minutes restores the toasted tops and warms the center evenly. The microwave works in a pinch, but the buns will soften and lose their structure.
Can I double this recipe for a larger crowd?
Yes, but use two pans instead of crowding one. Overloading a single pan traps too much steam, which can leave the buns soggy. Bake the pans side by side and rotate them halfway for even heat.
Print
Cheeseburger Sliders
- Prep Time: 15 minutes
- Cook Time: 40 minutes
- Total Time: 55 minutes
- Yield: 12 sliders 1x
- Category: Main Dish
- Method: Baking
- Cuisine: American
Description
Juicy cheeseburger sliders baked on Hawaiian rolls with melted cheese and classic burger sauce. Easy party food that stays moist and reliable.
Ingredients
- 1 medium onion
- 6 oz shredded cheddar cheese
- 3 tsp neutral oil
- 1 lb ground beef
- 2 tbsp yellow mustard
- 2 tsp Worcestershire sauce
- 1/2 tsp garlic powder
- 1/2 tsp kosher salt
- 1/4 tsp black pepper
- 12 Hawaiian sweet rolls
- 8 slices American cheese
- 1/2 cup dill pickles
- 1 tbsp butter
- 2 tsp sesame seeds
- 1/2 cup mayonnaise
- 1/4 cup ketchup
- 2 tbsp sweet pickle relish
- 1 tbsp yellow mustard
Instructions
- Brown sliced onions until lightly charred.
- Cook ground beef until deeply browned and season.
- Split rolls and layer cheese, onions, beef, cheddar, and pickles.
- Top with rolls, brush with butter, and add sesame seeds.
- Bake covered, then uncover until melted and toasted.
Notes
- The beef and onions can be cooked one day ahead and refrigerated separately.
- Burger sauce can be made up to four days in advance and stored airtight.
- Store leftovers refrigerated up to three days and reheat in oven or air fryer.
Nutrition
- Serving Size: 3 sliders
- Calories: 420
- Sugar: 9
- Sodium: 880
- Fat: 26
- Saturated Fat: 11
- Unsaturated Fat: 13
- Trans Fat: 0.5
- Carbohydrates: 28
- Fiber: 2
- Protein: 21
- Cholesterol: 85
 12")