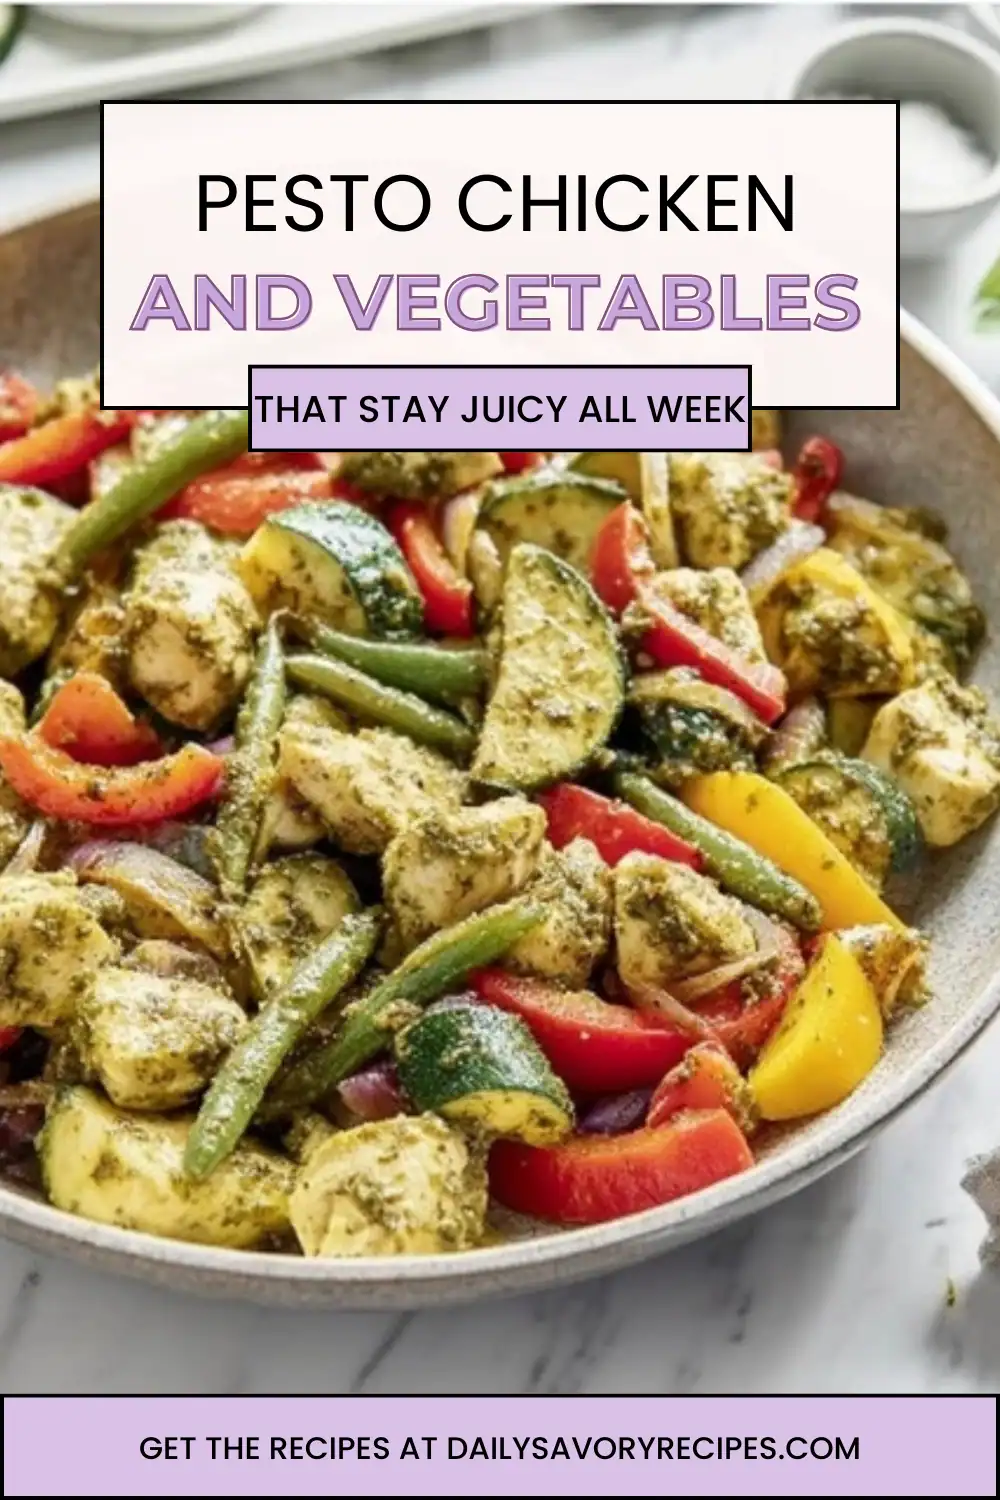

The Pesto Chicken and Vegetables That Actually Holds Up

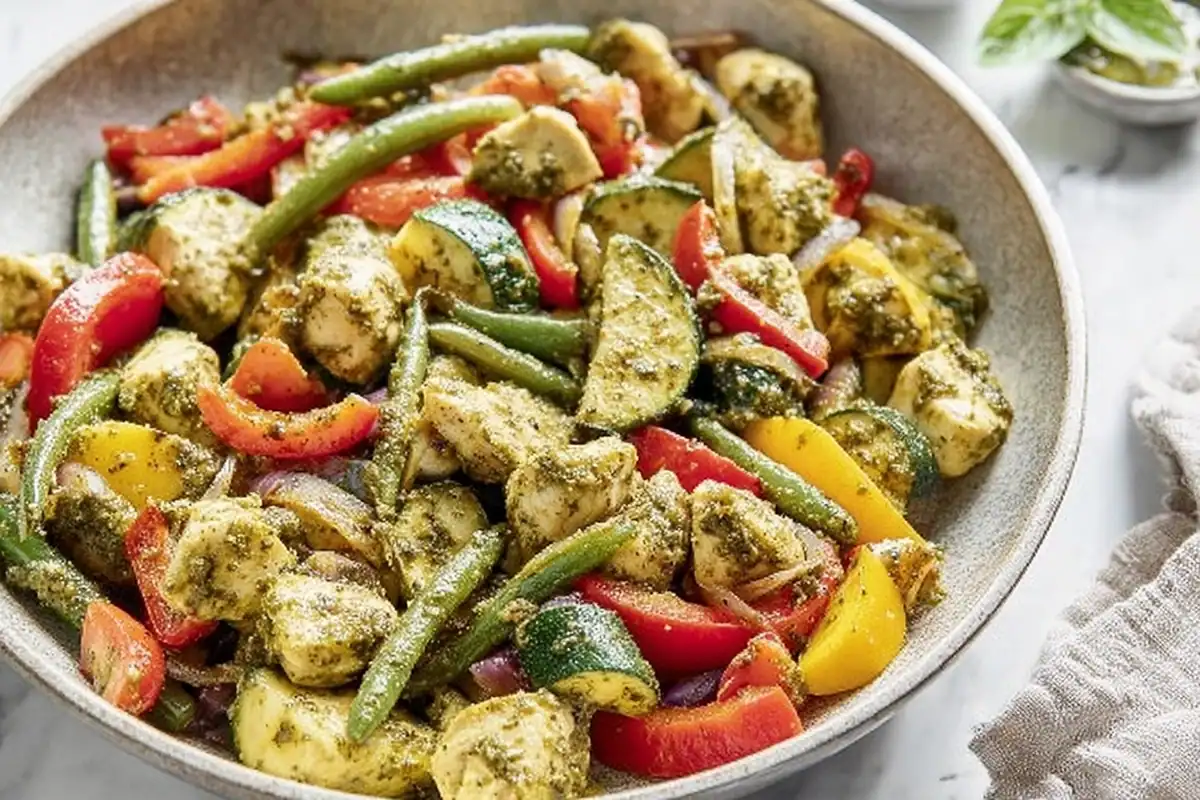
The first time I made Pesto Chicken and Vegetables for meal prep, I knew within five minutes whether it was going to work or end up as another sad plastic container in the back of the fridge. You know the smell I’m talking about—the skillet gets hot, the chicken hits the oil, and suddenly the kitchen smells like garlic, basil, and something worth looking forward to at lunch. That smell is the whole point. If a meal prep recipe doesn’t smell good while you’re cooking it, it’s not going to magically improve by day three.
Most pesto chicken recipes fall apart for one of two reasons. Either everything gets dumped into the pan at once and quietly steams itself into bland mush, or the pesto gets treated like a cooking fat and turns bitter and greasy. The end result is watery vegetables, dry chicken, and pesto that tastes flat instead of fresh. On paper, it’s a simple dish. In practice, the timing and the ingredient choices matter more than people admit.
Here’s my promise before we go any further: this version works because it respects heat, moisture, and restraint. Nothing fancy. No “chef tricks.” Just a clear plan for why each ingredient is here and when it should show up. This is Healthy Meal Prep that still tastes like food you’d cook on purpose, not food you tolerate because it’s Monday.
The No-Regret Ingredients (What Actually Matters Here)
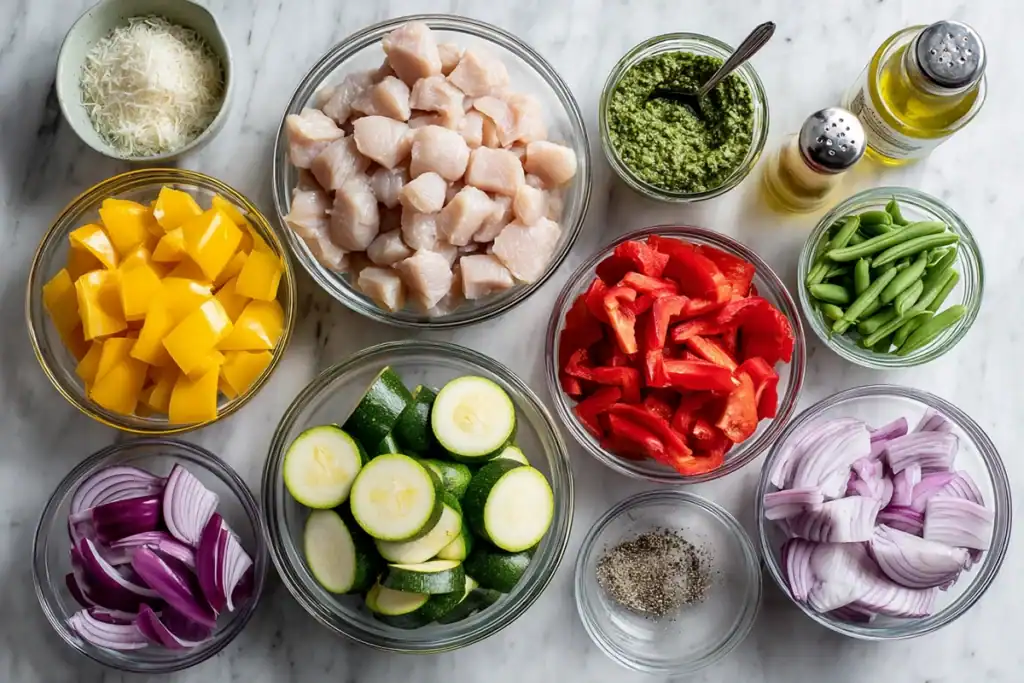
Chicken Breast
Boneless, skinless chicken breast works well here because it stays lean and absorbs flavor fast, but it needs to be treated correctly. I cut it into even, bite-sized pieces so it cooks quickly and doesn’t dry out while waiting on the vegetables. If you hate chicken breast, thighs will work—but breast is reliable if you don’t rush it.
Pesto
This is the one ingredient I don’t cheap out on. A good store-bought pesto should smell like basil first, not oil or cheese. If the ingredient list starts with soybean oil instead of olive oil, I put it back. Homemade is great, but a solid refrigerated pesto saves time without sacrificing flavor.
Bell Pepper
Red bell pepper brings sweetness that balances the pesto’s sharpness. Green peppers are cheaper, but they taste grassy here and fight the basil instead of supporting it. This is one place where color and sweetness actually matter.
Zucchini
Zucchini is here for texture, not flavor. It cooks fast, so I cut it thicker than you think and add it late. If your zucchini always turns soft and watery, that’s not the vegetable’s fault—it’s timing.
Yellow Squash
Yellow squash behaves like zucchini but has a slightly milder taste. I like using both because they cook the same way but don’t make the dish feel monotonous. If you only have one, that’s fine—just don’t double the amount and expect the same result.
Red Onion
Red onion adds bite and a little sweetness once it softens. I slice it, not dice it, so it stays present instead of disappearing. White onion works, but red plays nicer with pesto.
Frozen Green Beans
Frozen green beans are a quiet hero here. They’re already blanched, they don’t fall apart, and they release less water than fresh beans. This is one ingredient where frozen is actually the smarter choice.
Cooking Oil
Use a neutral oil with a decent smoke point—canola, avocado, or light olive oil. This oil is for heat, not flavor. The pesto handles the flavor later.
Salt and Black Pepper
Pesto is salty, but it’s not enough on its own. Light seasoning early makes everything taste intentional instead of flat. Freshly cracked pepper matters more than you think here.
Parmesan
This is a finishing move, not a main ingredient. A light sprinkle adds depth and ties everything together. Pre-grated is fine, but skip anything labeled “shelf-stable”—it won’t melt or taste right.
That’s it. No extras, no fillers. Once these ingredients are treated properly, the rest is just execution—which we’ll get into next.
The Process (How This Comes Together Without Turning to Mush)
Getting the Pan Hot Enough to Matter
This dish starts and ends with heat. I want the skillet hot before anything touches it—hot enough that when the oil goes in, it loosens up and shimmers instead of sitting there dull and thick. When the chicken hits the pan, you should hear an immediate, confident sizzle, not a timid hiss. Visually, the pieces should spread out and start turning opaque around the edges within a minute, and when you nudge one with your spatula, it should release easily instead of sticking like glue.
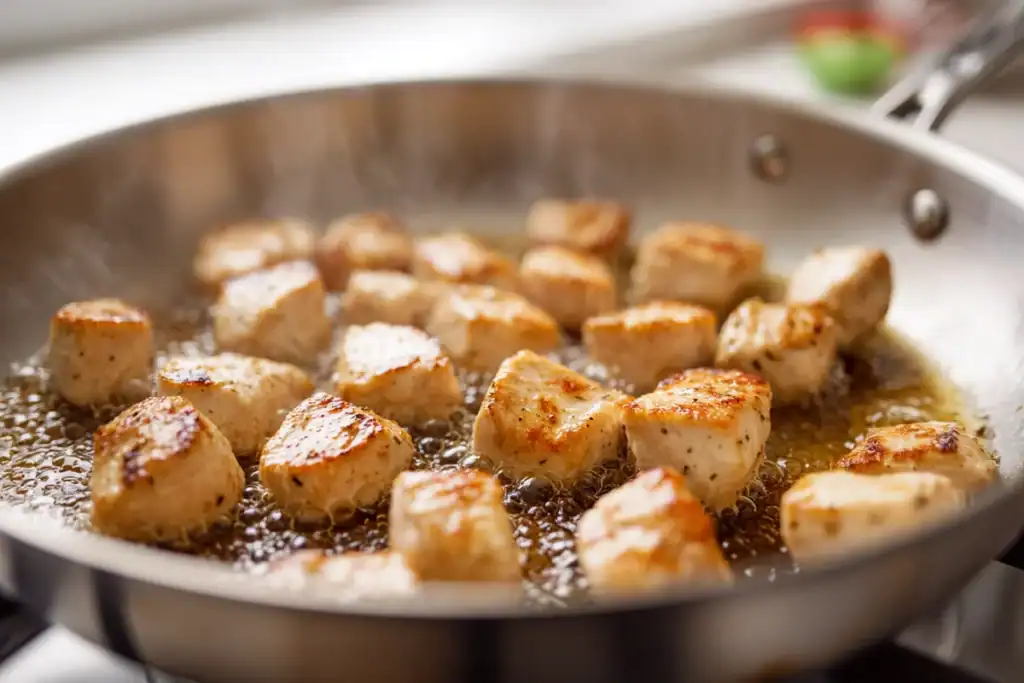
As you stir, pay attention to how the chicken feels under the spatula. It should feel firming but still springy, not stiff or rubbery. The smell at this stage should be clean and savory—hot oil and chicken, nothing sharp or burned. If you smell browning too fast or see dark spots forming instantly, your heat is too high. This is about controlled searing, not panic flipping.
Layering the Vegetables Without Dumping Water
Vegetables don’t all behave the same, and this is where patience pays off. Frozen green beans go in first because they need a minute to thaw and shed surface moisture. You’ll hear the sizzle soften briefly, then come back as the water evaporates. Watch the pan—if liquid pools and just sits there, the heat needs to go up slightly.
Bell pepper and red onion follow, and this is where color starts to matter. You’re looking for brighter reds and slightly translucent onion edges, not collapse. The vegetables should still feel crisp when you stir them, offering resistance instead of folding. The smell shifts here—sweet onion and pepper steam, but it should stay light and fresh, not heavy or boiled.
Zucchini and yellow squash come last. They soften fast, and you can see it happen: glossy edges, a slight bend when pushed, but no slumping. Touch-wise, they should feel tender on the outside but not hollow or mushy inside. If they start releasing lots of liquid, the pan wasn’t hot enough earlier.
When (and Why) the Pesto Goes In
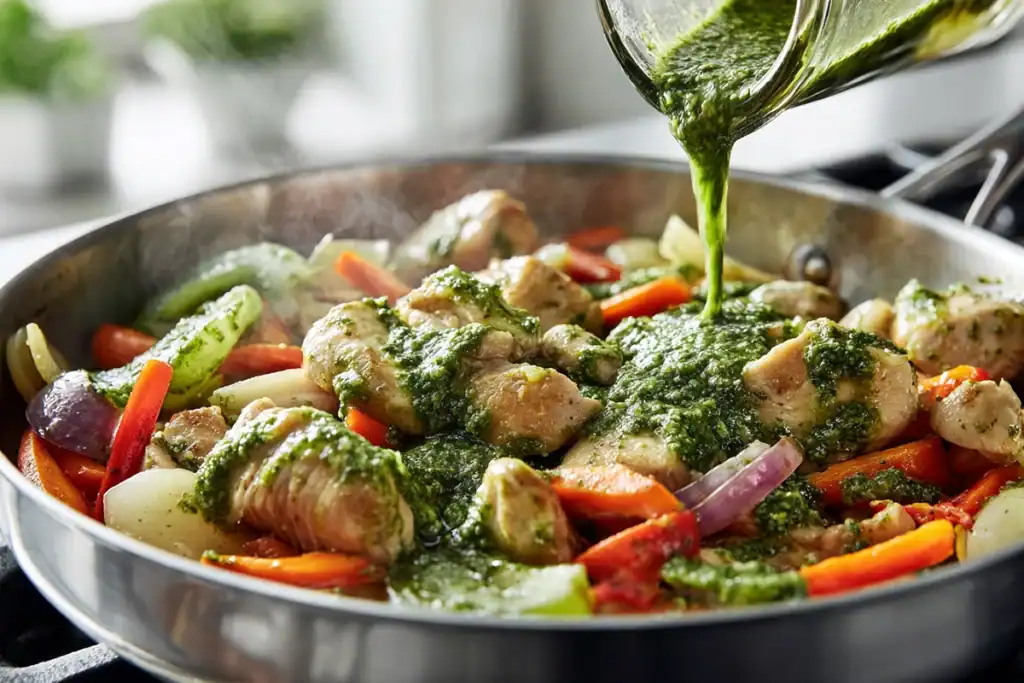
This is the quiet moment. The heat goes off before the pesto ever touches the pan. When you stir it in, you’re looking for a silky coating, not bubbling oil. The pesto should loosen and cling, turning everything glossy without separating. If you smell sharp basil or garlic hitting the heat, you waited too long to turn the burner off.
The final texture should feel cohesive when stirred—chicken and vegetables moving together instead of sliding apart. The smell should be unmistakably basil-forward, almost sweet, with no bitterness. This is where you taste and adjust, because once it’s right, it stays right all week.
The Uh-Oh Moments (Where This Goes Sideways)
Why Is Everything Watery?
I learned this one early, and it’s frustrating. If your pan fills with liquid, it’s almost always because too much went in at once or the heat was too low. Vegetables release water as they cook, and if that water doesn’t evaporate immediately, you’re steaming instead of sautéing. I fixed this by using a wider skillet and trusting higher heat—the sound should stay lively, not muted.
Why Is My Chicken Dry?
Dry chicken usually means it cooked too long before the vegetables showed up. Chicken breast tightens fast, and you can feel it when it happens—the pieces go from springy to stiff under the spatula. Pulling back slightly and remembering the chicken finishes cooking alongside the vegetables solved this for me. Pale chicken that finishes gently is better than browned chicken that eats like chalk.
Why Does My Pesto Taste Bitter?
This one hurt, because pesto isn’t cheap. If it tastes bitter, it’s too hot. Basil and garlic hate direct heat, and once that bitterness shows up, it doesn’t leave. The fix was simple but non-negotiable: heat off first, pesto second. When I stopped rushing this step, the flavor stayed bright instead of harsh.
Why Does It Taste Flat on Day Two?
If it tastes fine fresh but dull later, it probably needs more seasoning up front. Pesto carries salt, but it doesn’t replace it. Light seasoning early helps everything taste intentional, even after a night in the fridge. I started seasoning the chicken lightly before cooking, and the leftovers improved immediately.
Get these parts right, and the rest of the recipe feels almost automatic. The next section is where we talk about tweaking it, storing it, and actually enjoying it all week without regret.
Make It Your Own (Without Breaking It)
Chicken Thigh Upgrade
If you want this more forgiving, swap the chicken breast for boneless, skinless thighs. Thighs stay juicy even if you miss your timing by a minute, and you’ll notice it when you reheat—still tender, never chalky. The smell is a little richer when they hit the pan, and the finished dish has a slightly silkier bite, especially after a day in the fridge.
Lemon Finish (Highly Recommended)
A small squeeze of fresh lemon at the very end wakes everything up. You don’t want to smell lemon while it’s cooking—only after it’s off heat. It shouldn’t taste lemony; it should taste brighter, like someone turned the volume up on the pesto.
Spicy Pesto Version
If you like heat, add red pepper flakes after the pesto goes in, not before. Heating chili flakes in oil can make them harsh, but stirring them in at the end keeps the warmth clean. You should smell basil first, then feel heat a second later when you taste it.
Pasta or Grain Stretch
I sometimes turn this into two meals by folding it into cooked pasta or farro. Do this while everything is still warm so the pesto loosens and coats evenly. If it looks dry, a splash of reserved pasta water fixes it instantly—don’t add more oil.
Serving & Storing (How This Actually Fits Real Life)
I usually eat this warm the first night straight from a bowl, with nothing but a fork and maybe a little extra Parmesan on top. By day two, it’s excellent over rice or quinoa because the pesto has had time to settle into the chicken. Cold, it works surprisingly well as a lunch salad—I’ve eaten it straight from the container more times than I’ll admit.
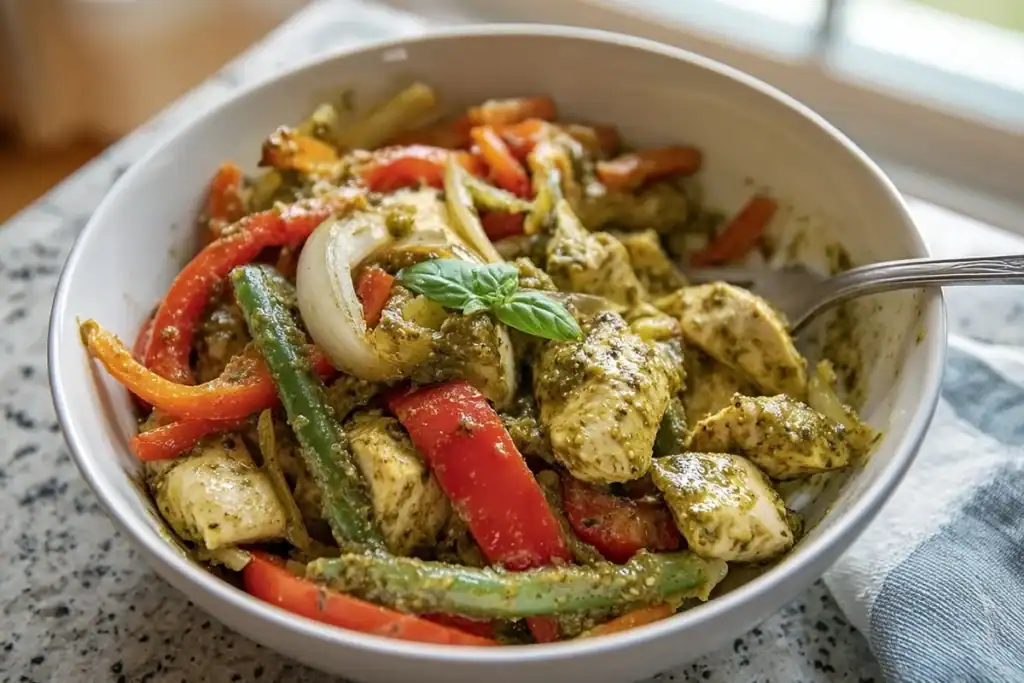
For storage, this is a fridge-first meal. It holds well for four days in airtight containers without turning soggy. Freezing works, but only if you’re realistic: the vegetables soften slightly when thawed. If you do freeze it, let it cool completely first and reheat gently—high heat turns the pesto oily and dull.
Reheating is best in a skillet over medium, where you can hear a gentle sizzle and smell the pesto wake back up. The microwave works, but stop early and stir; you’re warming it, not cooking it again.
Final Thought
That first skillet smell—the basil, garlic, and hot pan—is why this recipe exists. When Pesto Chicken and Vegetables still tastes good on day three, you know you did it right, and that’s the kind of reliability I cook for.
Get inspired with more mouthwatering recipes! Follow me on Pinterest for new cooking ideas every week.
Frequently Asked Questions
Can I use store-bought pesto, or should I make my own?
Yes, store-bought pesto works just fine—as long as it’s a good one. Look for pesto that smells strongly of basil when you open the jar and uses olive oil instead of cheaper seed oils. If it tastes overly salty or oily on its own, it will taste worse once heated.
Is this good cold, like a salad?
Surprisingly, yes. Once chilled, the flavors settle and the pesto clings nicely to the chicken and vegetables. I’ve eaten it straight from the fridge with a fork, and it holds up especially well if the vegetables weren’t overcooked.
Can I bake this instead of using a skillet?
You can, but it’s not my first choice. Baking makes it harder to control moisture, and the vegetables tend to steam before they brown. If you do bake it, spread everything out on a large sheet pan and add the pesto only after it comes out of the oven.
What vegetables hold up best for meal prep?
Firm vegetables with low water content work best. Bell peppers, green beans, broccoli, and even asparagus reheat well. Mushrooms and spinach release too much moisture and make everything soggy by day two.
Can I freeze pesto chicken and vegetables?
Yes, but with realistic expectations. The flavor survives freezing, but the vegetables soften slightly when thawed. Let it cool completely before freezing, and reheat gently—high heat will separate the pesto.
How do I keep the chicken from drying out?
Don’t overcook it at the start. The chicken should still be slightly soft when the vegetables go in, because it finishes cooking later. If it feels stiff and tight early on, it’s already gone too far.
Is this good with pasta or rice later in the week?
Absolutely. I often stretch it into a second meal by folding it into pasta or serving it over rice. Warm it gently and add a splash of water if it looks dry—the pesto loosens right back up.
That first skillet smell—the basil, garlic, and hot pan—is why this recipe exists. When Pesto Chicken and Vegetables still taste good on day three, you know you did it right, and that’s the kind of reliability I cook for.
Pesto Chicken and Vegetables
Ingredients
Method
- Heat oil in a large skillet until shimmering.
- Add chicken and sauté until just opaque.
- Add green beans and cook until thawed.
- Add bell pepper and red onion; cook briefly.
- Add zucchini and yellow squash; sauté until tender.
- Remove from heat and stir in pesto.
- Season with salt and pepper and finish with Parmesan.
Notes
- Use a wide skillet to avoid steaming.
- Add pesto off heat to prevent bitterness.