
Rhubarb Scones with Sour Cream – Tender, Buttery, and Lightly Tart


Rhubarb scones are one of those bakes that rely more on balance than complexity. The fruit brings sharpness, the dough carries richness, and when both are handled right, you get something soft though structured. These Rhubarb Scones use sour cream to keep the crumb tender without making the dough heavy.
I started using sour cream after testing batches which felt too dry the next day. It holds moisture better than cream alone, and you’ll notice the difference after baking.
You’ll also see how small steps—like treating the rhubarb or chilling the dough—change the final texture more than any ingredient swap.
What Makes These Rhubarb Scones So Good
The first thing you notice is the texture. Not crumbly in a dry way, but soft with just enough structure to hold together when you break one open. That comes from using sour cream combined with a bit of milk instead of relying only on cream. It slows down moisture loss during baking.
Then there’s the rhubarb. Raw, it’s sharp and fibrous. But once it bakes, it softens into small pockets of tartness that cut through the depth of the dough. If you skip preparing it properly, though, it can release too much water and affect the structure.
I also like adding crystallized ginger in small amounts. Not enough to dominate, just enough to give a warm note behind the fruit. Optional, but worth trying once.
Ingredients That Shape Flavor and Texture
You don’t need many ingredients, but each one matters more than usual here.
- Rhubarb (1.5–2 cups): Chop it small, about 1 cm pieces. Larger chunks stay stringy.
- Flour (2–2.5 cups): Enough to hold the dough, but don’t overpack it when measuring.
- Cold butter (½ cup or up to 10 tbsp): Cut into cubes and keep it chilled. Warm butter ruins the texture before baking even starts.
- Sour cream (200 ml) + milk (4 tbsp): This combination gives you control. Sour cream for richness, milk to loosen the dough slightly.
- Sugar (½ cup): Not just sweetness—it also helps draw moisture from the rhubarb.
- Leavening (1 tbsp baking powder + ¼ tsp sodium bicarbonate): You need both for lift and proper browning.

Fresh Rhubarb and How to Prepare It
Don’t throw it straight into the dough. Toss it with about 2 tablespoons of sugar and let it sit for at least 30 minutes. You’ll see liquid collecting at the bottom. Discard that liquid. This step prevents soggy scones.
Sour Cream vs. Cream — What Changes in the Dough
Cream gives a lighter crumb, but it dries faster. Sour cream adds fat and acidity, which keeps the scones soft longer. I prefer this version if you’re not eating them immediately.
Butter, Flour, and the Importance of Temperature
Everything should be cold. Not just the butter—the mixing bowl, even the flour if your kitchen is warm. When butter melts too early, you lose those small steam pockets that create lift in the oven.
A Simple Walkthrough of the Dough Process
Start by rubbing or cutting the cold butter into the flour. You’re not aiming for smoothness. You want uneven pieces—some fine, some pea-sized. That variation is what gives the scone its stratified texture.
Mix your wet ingredients separately. The sour cream, milk, and vanilla should be fully blended before they touch the flour. Once you combine everything, keep it brief. Overmixing develops gluten, and that leads to dense scones.
The dough should feel slightly sticky but not wet. If it clings too much to your hands, dust lightly with flour—but don’t keep adding more. That’s a common mistake.
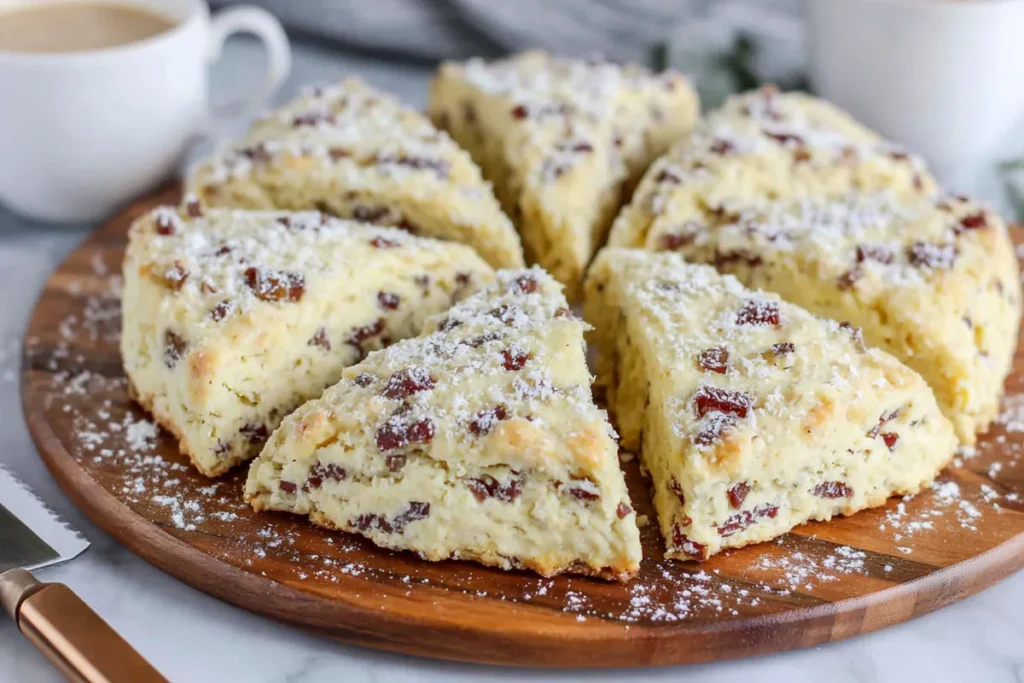
Press the dough into a round about 2–3 cm thick, then cut into wedges. Don’t twist the cutter or knife. Press straight down. Twisting seals the edges and limits the rise.
Step-by-Step Instructions for Baking Rhubarb Scones
Once your dough is shaped, don’t rush it into the oven. This is where most people lose structure.
Place the cut scones on a tray and freeze them for about 15 minutes while the oven preheats to 200°C (392°F). That short chill firms up the butter again. It’s a small step, but it helps the scones hold their shape instead of spreading.

When baking, watch the edges more than the tops. After 15 minutes, you’ll start to see the sides turning lightly golden. That’s your first cue. Depending on size, they’ll need 15 to 22 minutes total.
If you tap the side lightly, it should feel set—not soft or doughy. The bottoms should have a slight crispness, not a pale finish. If they’re still pale underneath, give them a few more minutes.
Once out of the oven, let them rest for at least 10 minutes. Cutting too early makes them feel underbaked even when they’re not. The structure finishes setting as they cool.
I usually serve them plain. But if you have something like rhubarb jam on hand, it works well without overpowering the flavor.
Small Details That Make a Big Difference
A few small steps decide whether your scones turn out light or dense. Start with the rhubarb. Letting it sit with sugar for at least 30 minutes draws out excess moisture. Skip that, and the dough can turn wet in spots, especially near the fruit.
Temperature matters more than people expect. If your kitchen is warm, chill the flour and even the mixing bowl for 10 minutes. The butter needs to stay firm until it hits the oven. Once it melts too early, you lose that slight lift and the crumb tightens.
Freezing the shaped dough isn’t just for convenience. It gives you cleaner edges and better height during baking. If you’re planning ahead, freeze the cut scones on a tray, then store them in a bag. Bake straight from frozen, adding about 3 extra minutes to the total time.
Fresh from the Oven, Hard to Resist
These scones are at their best when they’ve cooled just enough to handle but are still warm inside. The texture holds, the rhubarb softens, and the flavor settles.
If you remember one thing, let it be this: keep everything cold and handle the dough lightly. That’s what gives you a soft interior without making it heavy.
Get inspired with more delicious recipes! Follow me on Pinterest for new cooking ideas every week.
Rhubarb Scones with Sour Cream
Ingredients
Method
- Toss chopped rhubarb with 2 tablespoons sugar and let sit for 30 minutes, then drain excess liquid.
- Preheat oven to 200°C (392°F) and line a baking tray with parchment paper.
- Mix flour, baking powder, baking soda, salt, and sugar in a bowl.
- Cut in cold butter until mixture forms uneven crumbs with some pea-sized pieces.
- In a separate bowl, mix sour cream, milk, and vanilla.
- Combine wet and dry ingredients gently until a shaggy dough forms.
- Fold in rhubarb and optional ginger without overmixing.
- Turn dough onto a lightly floured surface and shape into a round about 2–3 cm thick.
- Cut into wedges and place on prepared baking tray.
- Chill or freeze for 15 minutes before baking.
- Bake for 15–22 minutes until edges are golden and bottoms are lightly crisp.
- Cool for 10 minutes before serving.
Notes
- Letting rhubarb sit with sugar prevents excess moisture in the dough.
- Keep all ingredients cold to maintain proper texture.
- Do not overmix the dough to avoid dense scones.
- Freeze shaped scones for better structure and make-ahead baking.
- Bake directly from frozen, adding about 3 minutes to baking time.