
Pumpkin Pie Cookies

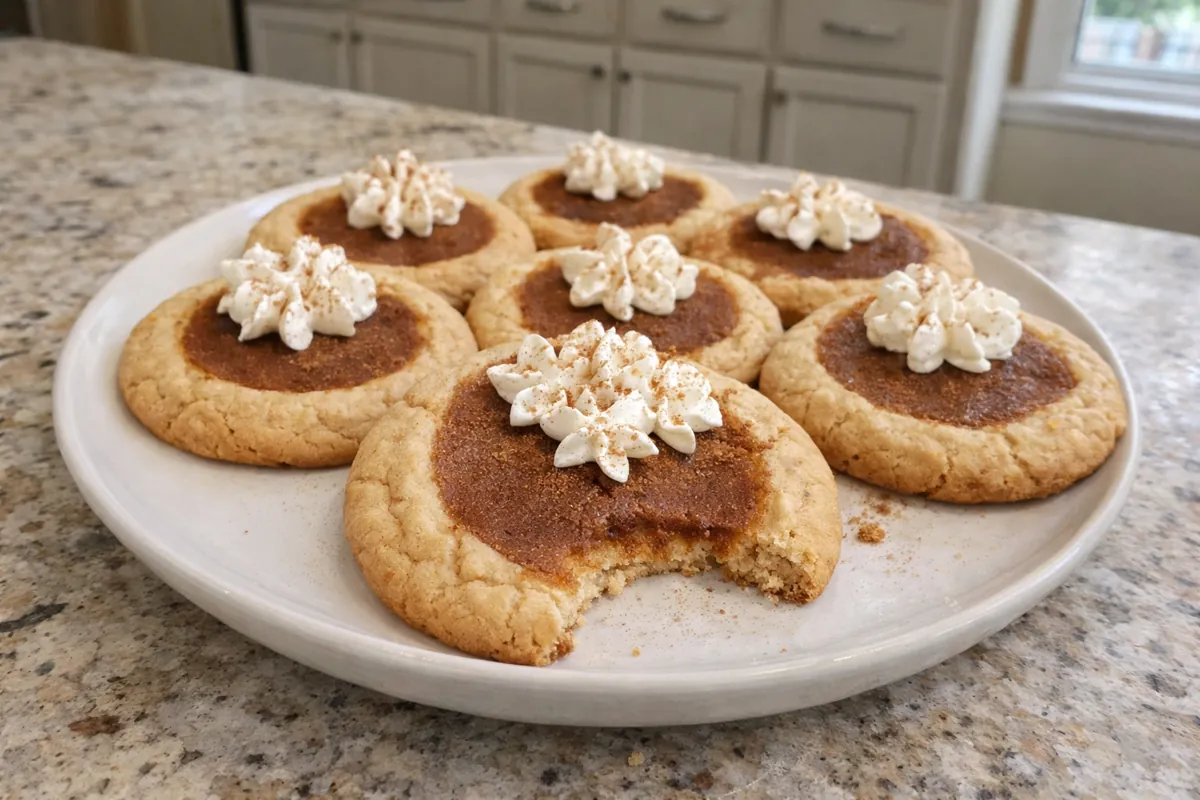
These Aren’t Just Cookies — They’re Mini Pumpkin Pies in Disguise
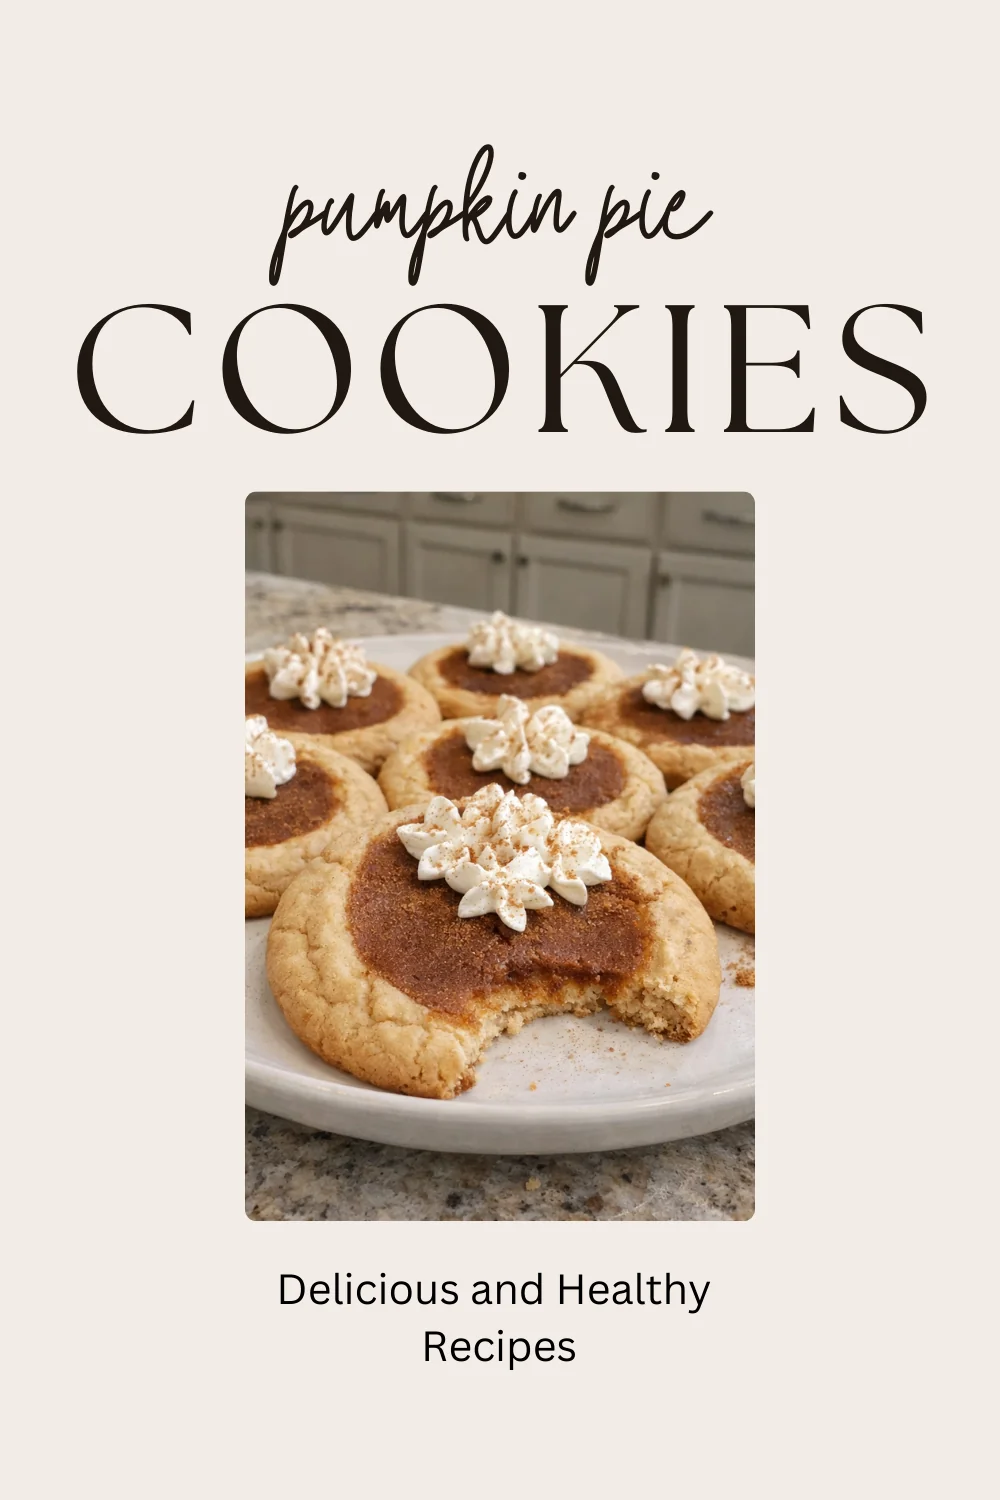
Most dessert tables are overloaded with full pies. Someone slices them too big, someone else says they’re too full, and half a pie ends up drying out by the end of the night. That’s exactly why I started making pumpkin pie cookies instead. They deliver everything people love about classic pumpkin pie — the creamy spiced center, the buttery base, the dollop of whipped cream — but in a perfectly portioned, handheld form. No slicing. No soggy crust. No “just a sliver, please.”
What makes these special isn’t just the flavor. It’s the structure. This isn’t a pumpkin-flavored cookie with some spice mixed in. It’s a soft brown sugar cookie shaped to hold a true pumpkin pie-style custard filling. The edges stay tender and chewy, while the center sets up silky and rich, almost like a mini tart. The contrast is what makes people go back for a second one.
In this post, I’ll walk you through what makes each ingredient matter, why a couple of them are non-negotiable, and how to set yourself up for bakery-level results before we ever turn on the oven.
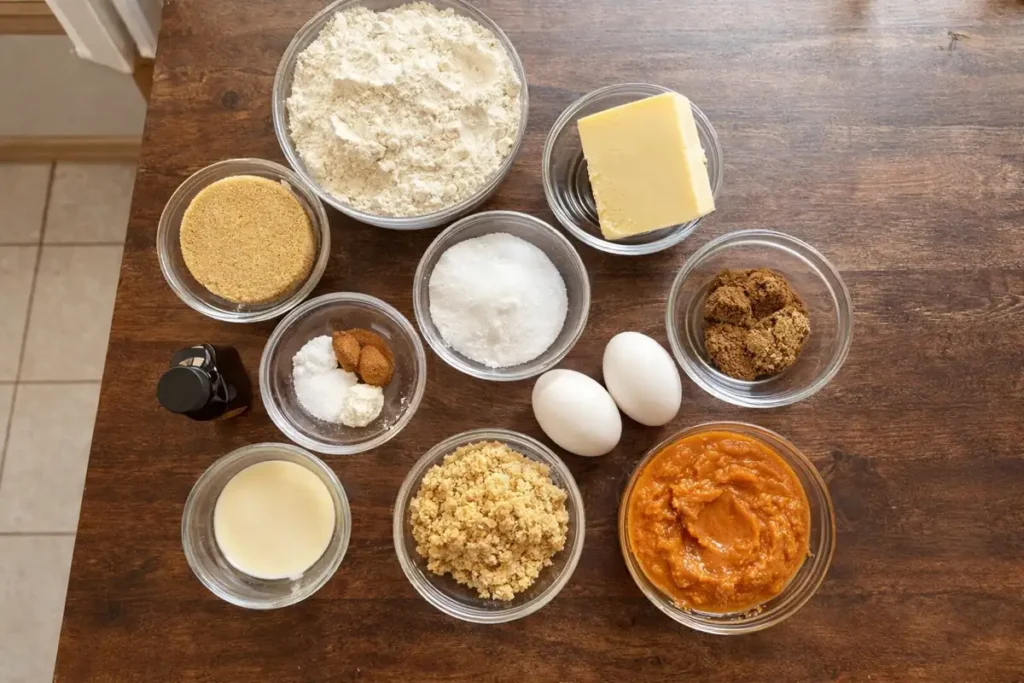
The Ingredients That Make These Feel Special
Unsalted Butter
Use real, unsalted butter at room temperature. This is not the place for margarine or spreadable substitutes — the flavor simply won’t compare, and the texture won’t hold the same way once baked. Butter gives the cookie its structure and that subtle richness that mimics pie crust.
Light Brown Sugar
Brown sugar is what keeps the cookie soft and chewy while adding depth. The molasses in it complements pumpkin beautifully. Dark brown sugar can work in a pinch, but it will make the flavor slightly heavier and more intense.
Granulated Sugar
The smaller amount of white sugar balances the chewiness from the brown sugar and helps the edges set properly. No need for fancy brands here — basic grocery store sugar works perfectly.
All-Purpose Flour
Standard all-purpose flour is exactly what you want. This isn’t a delicate pastry that requires specialty flour. Save your money — the affordable option works just fine and gives the cookie enough structure to support the filling.
Baking Powder & Baking Soda
This combination gives the cookie lift without making it cakey. It’s a small detail, but the balance matters for texture.
Cinnamon
Just enough to warm the dough without overpowering the pumpkin filling. Fresh cinnamon makes a difference here — if yours has been in the cabinet for years, it’s time for a refill.
Pure Pumpkin Purée
Make sure the can says 100% pure pumpkin — not pumpkin pie filling.
Pumpkin pie filling is already sweetened and spiced, which will completely throw off the balance of this recipe.
Brown Sugar (for the Filling)
A little sweetness deepens the pumpkin flavor and helps the custard set properly.
Egg
The egg in the filling is what turns it from a pumpkin mixture into a true custard. Room temperature works best so it blends smoothly.
Evaporated Milk or Cream
Evaporated milk gives that traditional pumpkin pie richness without being too heavy. Heavy cream works too if that’s what you have, but evaporated milk keeps the texture classic.
Pumpkin Pie Spice
You can use store-bought or make your own blend. This is one place where I don’t mind the inexpensive version — most blends are very similar. Just make sure it’s fresh for full flavor.
Heavy Whipping Cream & Powdered Sugar
Fresh whipped cream on top transforms these from “nice cookies” to “dessert table centerpiece.” Skip canned topping here — homemade cream holds better and tastes cleaner.
That’s everything you need. Simple ingredients, but each one plays a specific role.
From Dough Log to Dessert Table
Creaming for Structure, Not Just Sweetness
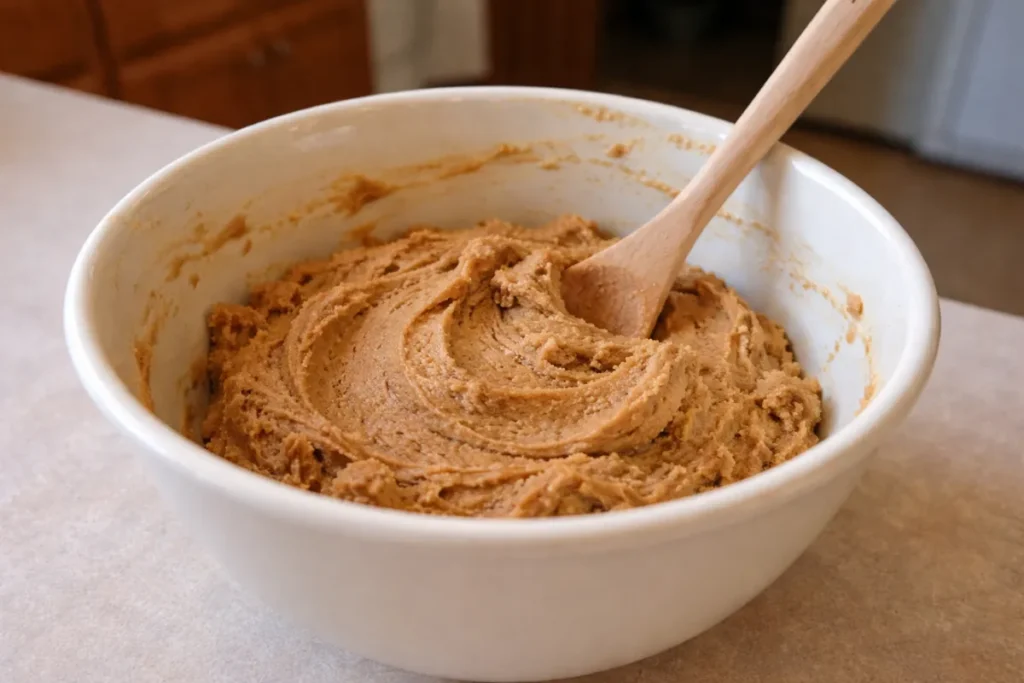
Start by creaming the butter and sugars together until the mixture turns noticeably lighter in color and looks slightly fluffy. When you drag a spatula through it, it should feel smooth and soft, not greasy or separated. You’ll hear the mixer shift from a heavy, dense sound to a lighter whir as air gets incorporated — that’s exactly what you want. When you add the egg and vanilla, the mixture should look glossy and cohesive, not curdled. If it looks split, keep mixing; it will come together.
Once the dry ingredients go in, mix just until you don’t see streaks of flour. The dough should feel soft and slightly tacky — like the sticky side of a Post-it note — but not wet like glue. Overmixing here will make the cookies tough instead of tender, so stop as soon as it looks evenly blended.
Shaping the Centers That Hold the Filling
After chilling the dough, it should feel firm but still pliable when you press it between your fingers. Slice and roll into smooth balls, then press a deep divot into the center. You’re aiming for a well about half an inch deep with sturdy walls around the edge. If cracks form, gently pinch them back together; you don’t want weak spots where filling can escape.
When properly shaped, the cookie should look like a tiny bowl. The surface will be smooth and matte from the chill. A second quick chill before baking helps the dough hold that shape — the difference is visible once baked, with clean edges instead of spread-out puddles.
Baking in Two Phases for the Perfect Texture
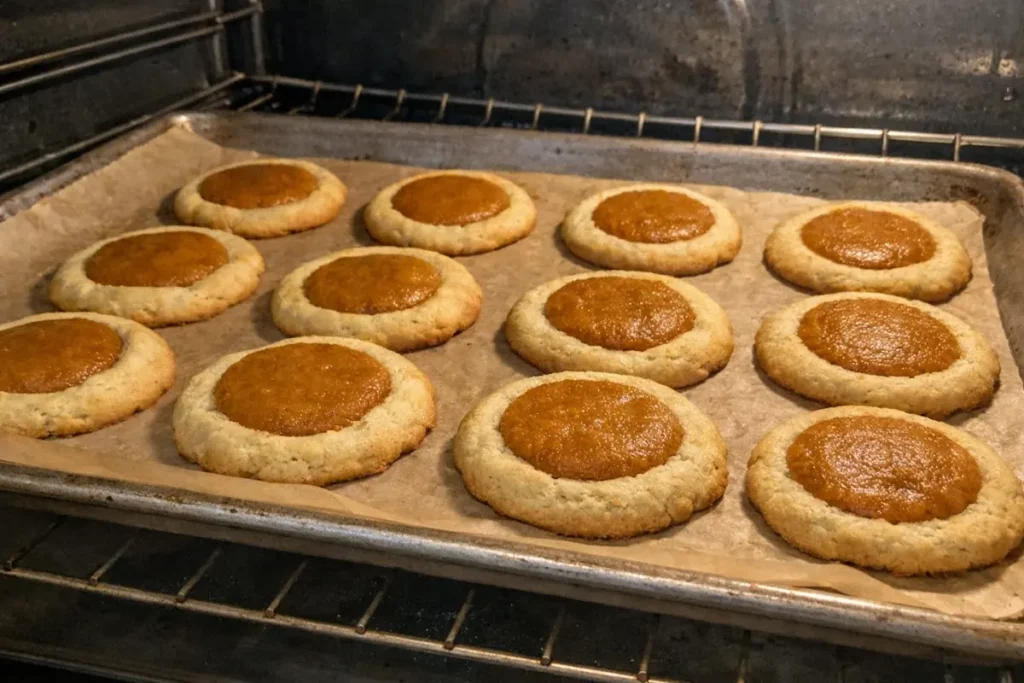
When the cookies hit the oven at the higher temperature, you’ll see the edges begin to puff slightly and turn pale golden. After lowering the heat, watch for the filling. It should lose its shiny, liquid look and become softly set with just the faintest wobble in the center when you gently jiggle the pan. The smell will shift from raw pumpkin to warm spice and toasted sugar — that’s your cue, they’re nearly there.
If you use the optional mid-bake “top-off” technique, you’ll notice the filling looks slightly sunken halfway through. Adding a little more at that point creates that thicker, bakery-style center. When fully baked, the edges should be lightly browned and the centers matte, not glossy or wet.
Let them cool on the sheet for a few minutes. They’ll feel delicate at first, but as they cool, the filling firms up and the bottoms release cleanly. Once cooled completely, the whipped cream should pipe smoothly and hold soft peaks without sliding.
The Details That Actually Matter
The Divot Isn’t Deep Enough
If your centers are shallow, the filling will overflow and spread. The cookies will still taste good, but they won’t look like miniature pumpkin pies. Press firmly when shaping and reinforce the walls so they stay upright during baking.
You Skipped the Second Chill
This step feels optional — it’s not. Warm dough spreads faster than the custard can set, and you’ll lose that defined edge. If the dough feels soft when you press it, it needs more time in the fridge.
The Filling Looks Cracked
Cracks usually mean the cookies were baked a little too long or the oven stayed too hot after the temperature drop. The filling should look set but still slightly soft in the very center when you pull it out. They continue to firm up as they cool.
These are small details, but they’re the difference between “nice pumpkin cookies” and pumpkin pie cookies that look like they belong on a dessert table.
Three Directions You Can Take This
Maple-Spiced Version
If you want to lean fully into fall flavor, add one teaspoon of pure maple syrup to the pumpkin filling and reduce the brown sugar in the filling by about a teaspoon to keep it balanced. The maple adds a deeper, almost caramel-like note that pairs beautifully with pumpkin pie spice. I’ve tested this version for holiday trays, and it tastes more “grown-up” without becoming overly sweet.
Toasted Pecan Edge
For a little texture contrast, press finely chopped toasted pecans around the rim of each cookie after shaping the divot. The nuts are toasted further in the oven adding a subtle crunch against the soft cookie and creamy center. Make sure they’re chopped small — large pieces fall off during baking and make the cookies harder to bite cleanly.
Gingerbread-Style Base
If you prefer a stronger spice profile, swap the cinnamon in the cookie dough for a mix of ground ginger and a pinch of cloves. The result feels closer to a holiday gingerbread cookie holding pumpkin custard. Just keep the spices balanced — too much clove will overpower the pumpkin and shift the focus away from that classic pumpkin pie flavor.
From Counter to Table
I like serving these pumpkin pie cookies slightly chilled or at cool room temperature, just like traditional pumpkin pie. When they’re too warm, the filling feels softer, and the whipped cream can slide. When properly cooled, the center is silky but set, and the whipped cream holds its shape beautifully.
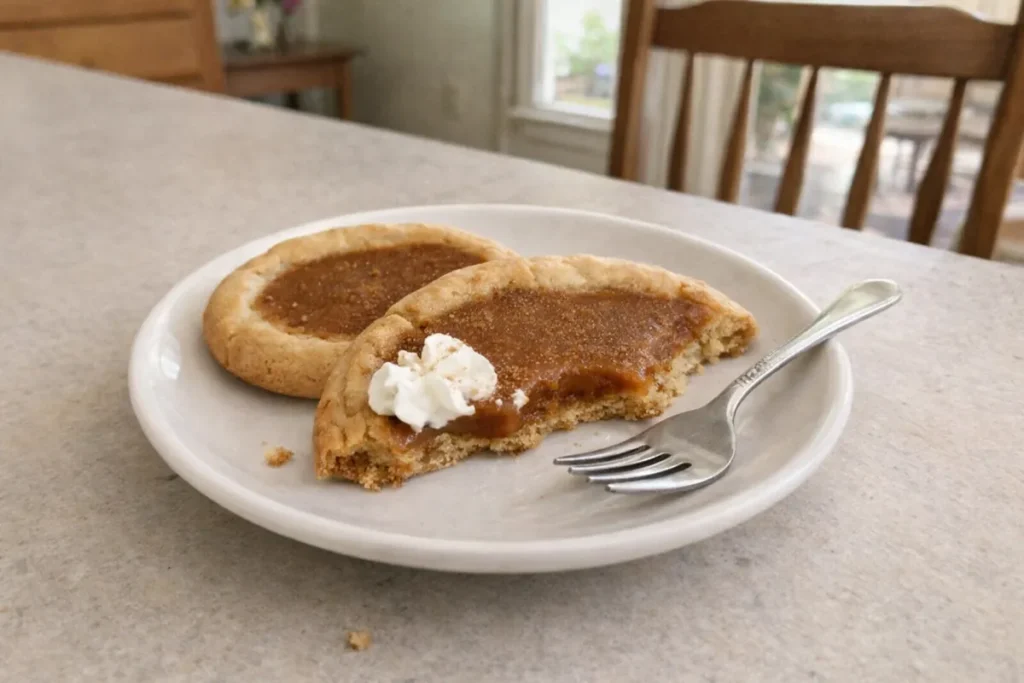
If you’re making them for a holiday gathering, bake the cookies a day ahead and store them in an airtight container in the refrigerator. Add the whipped cream topping the day you serve them so it looks fresh and defined. They’ll keep well in the fridge for up to three days, though the texture is best within the first two.
For freezing, skip the whipped cream. Freeze the fully baked and cooled cookies in a single layer until solid, then transfer to a freezer-safe container with parchment between layers. Thaw them overnight in the refrigerator — not on the counter — so the custard center stays smooth instead of weeping. I don’t recommend reheating; these aren’t meant to be warm like classic cookies. They’re meant to mimic pie.
A Smarter Way to Do Pumpkin Pie
If your dessert table usually revolves around one big pie, these pumpkin pie cookies change the game without losing the tradition. Same cozy flavor, easier to serve, and honestly — they disappear faster than any full-sized pie I’ve ever set out.
Get inspired with more mouthwatering recipes! Follow me on Pinterest for new cooking ideas every week.
Frequently Asked Questions
Can I use canned pumpkin pie filling instead of pure pumpkin purée?
No. Pumpkin pie filling is already sweetened and spiced, which will throw off the balance and make the centers overly sweet and loose. Use 100% pure pumpkin purée so you control the sweetness and spice level.
Why did my filling crack on top?
Cracks usually mean the cookies were baked a little too long or the oven stayed too hot after lowering the temperature. The centers should still have a slight jiggle when you remove them from the oven. They continue to set as they cool.
Why did my cookies spread too much?
Most likely, the dough wasn’t chilled long enough, especially after shaping the divots. If the dough feels soft or sticky when you handle it, it needs more time in the fridge. Warm butter equals flat cookies.
Can I freeze pumpkin pie cookies?
Yes, but freeze them without whipped cream. Let them cool completely, freeze in a single layer first, then stack with parchment between layers. Thaw overnight in the refrigerator so the custard center stays smooth.
Can I make the dough in advance and bake later?
Absolutely. The dough log can stay wrapped tightly in the refrigerator for up to 48 hours before slicing and shaping. In fact, a longer chill can slightly deepen the flavor.
Do these taste like pumpkin cookies or actual pumpkin pie?
They taste closer to pumpkin pie. The center is a true custard-style filling, not cake-like or bready. The cookie acts more like a soft crust than a typical drop cookie.
Pumpkin Pie Cookies
Ingredients
Method
- Cream butter and sugars until light and fluffy.
- Mix in egg and vanilla until smooth.
- Whisk dry ingredients and fold into butter mixture.
- Shape dough into a log and chill for 30 minutes.
- Slice dough, roll into balls, and press deep divots in centers.
- Chill shaped cookies for 10-15 minutes.
- Whisk pumpkin purée, sugar, egg, milk, flour, and spice for filling.
- Fill each cookie center with pumpkin mixture.
- Bake at 375°F for 3 minutes, then reduce to 350°F and bake 10 more minutes until set.
- Cool completely on rack.
- Whip cream with powdered sugar and pipe on cooled cookies.
Notes
- Use 100% pure pumpkin purée, not pumpkin pie filling.
- Chill dough twice to prevent spreading.
- Do not overbake; centers should have a slight jiggle when removed from oven.
- Freeze without whipped cream for best results.