
Classic Cherry Pie With a Golden Crust and Thick Filling


Classic Cherry Pie has a way of making a kitchen smell settled and warm before it’s even out of the oven. This version keeps things simple by using canned cherry filling, but the finished pie still has the crisp crust and rich texture people expect from a homemade dessert.
I add a little almond extract to the filling because cherries and almond naturally work well together. It’s a small detail, but it gives the pie a fuller flavor without making the process more complicated. You’ll also learn how to avoid soggy crust edges and why cooling time matters more than most people think.
Choosing the Right Cherries for Classic Cherry Pie
Canned cherry pie filling keeps this recipe practical, especially when you need dessert on the table without spending half the afternoon pitting fruit. I’ve tested plenty of homemade cherry fillings over the years, but honestly, a good canned filling works well here because the pie is more about texture and balance than showing off fresh fruit.
That said, not all fillings taste the same. Some lean heavily sweet while others have a sharper cherry flavor. If you can find tart cherry filling, it usually gives the pie a cleaner finish instead of tasting sugary from the first bite to the last.
The almond extract matters too. Don’t pour carelessly. About 1/4 to 1 teaspoon is enough depending on how strong you want it. Too much starts pushing the pie toward candy-like flavor, and that’s usually not what you want from a classic cherry pie.
The Baking Tools That Make Pie Easier
A deep dish pie plate gives the filling enough room to bubble properly without overflowing too quickly into the oven. Standard shallow plates can work, though you may need slightly less filling. I still prefer deep dishes because the slices hold together better after cooling.
Pie shields are one of those tools people ignore until they burn three crusts in a row. The outer crust edge browns faster than the center because it’s thinner and fully exposed. Covering it after about 15 minutes of baking keeps the edges from getting overly dark before the filling heats through.
No pie shield? Fold strips of aluminum foil around the rim. Slightly annoying, but effective.
A large cutting board also helps if you’re making decorative cutouts or lattice strips. Trying to slice pie dough directly on the counter usually warms it too quickly.
Building a Cherry Filling That Slices Cleanly
The filling in a good cherry pie shouldn’t run across the plate the second you cut into it. Since canned fillings are already thickened, your biggest job is actually restraint. Don’t add extra liquid. Even an extra splash of juice can loosen the texture more than expected once it heats in the oven.
After spooning the filling into the crust, smooth it evenly with a spatula so the top crust sits flat instead of stretching over uneven pockets. That stretching can create hollow spaces where steam collects.
Steam vents matter for more than appearance. Without openings in the top crust, trapped steam pushes upward and creates large bubbles under the dough. Four small cutouts usually solve the problem neatly. If you don’t have small cutters, a few slits with a sharp knife work perfectly fine.
One thing I’ve learned after years of baking pies: let the filling cool fully before judging the texture. A hot cherry pie almost always looks looser than it actually is.
Crust Options for a More Homemade Look
A standard double crust is the fastest route and honestly the one I make most often at home. Lay the top crust gently over the filling instead of pulling it tight. Stretched dough tends to shrink during baking, which can expose the filling around the edges.
Press the top and bottom crusts together firmly around the rim. A little water helps the dough stick if it feels dry. Trim any large overhang before crimping. Thick folded edges can stay doughy even after 45 minutes in the oven.
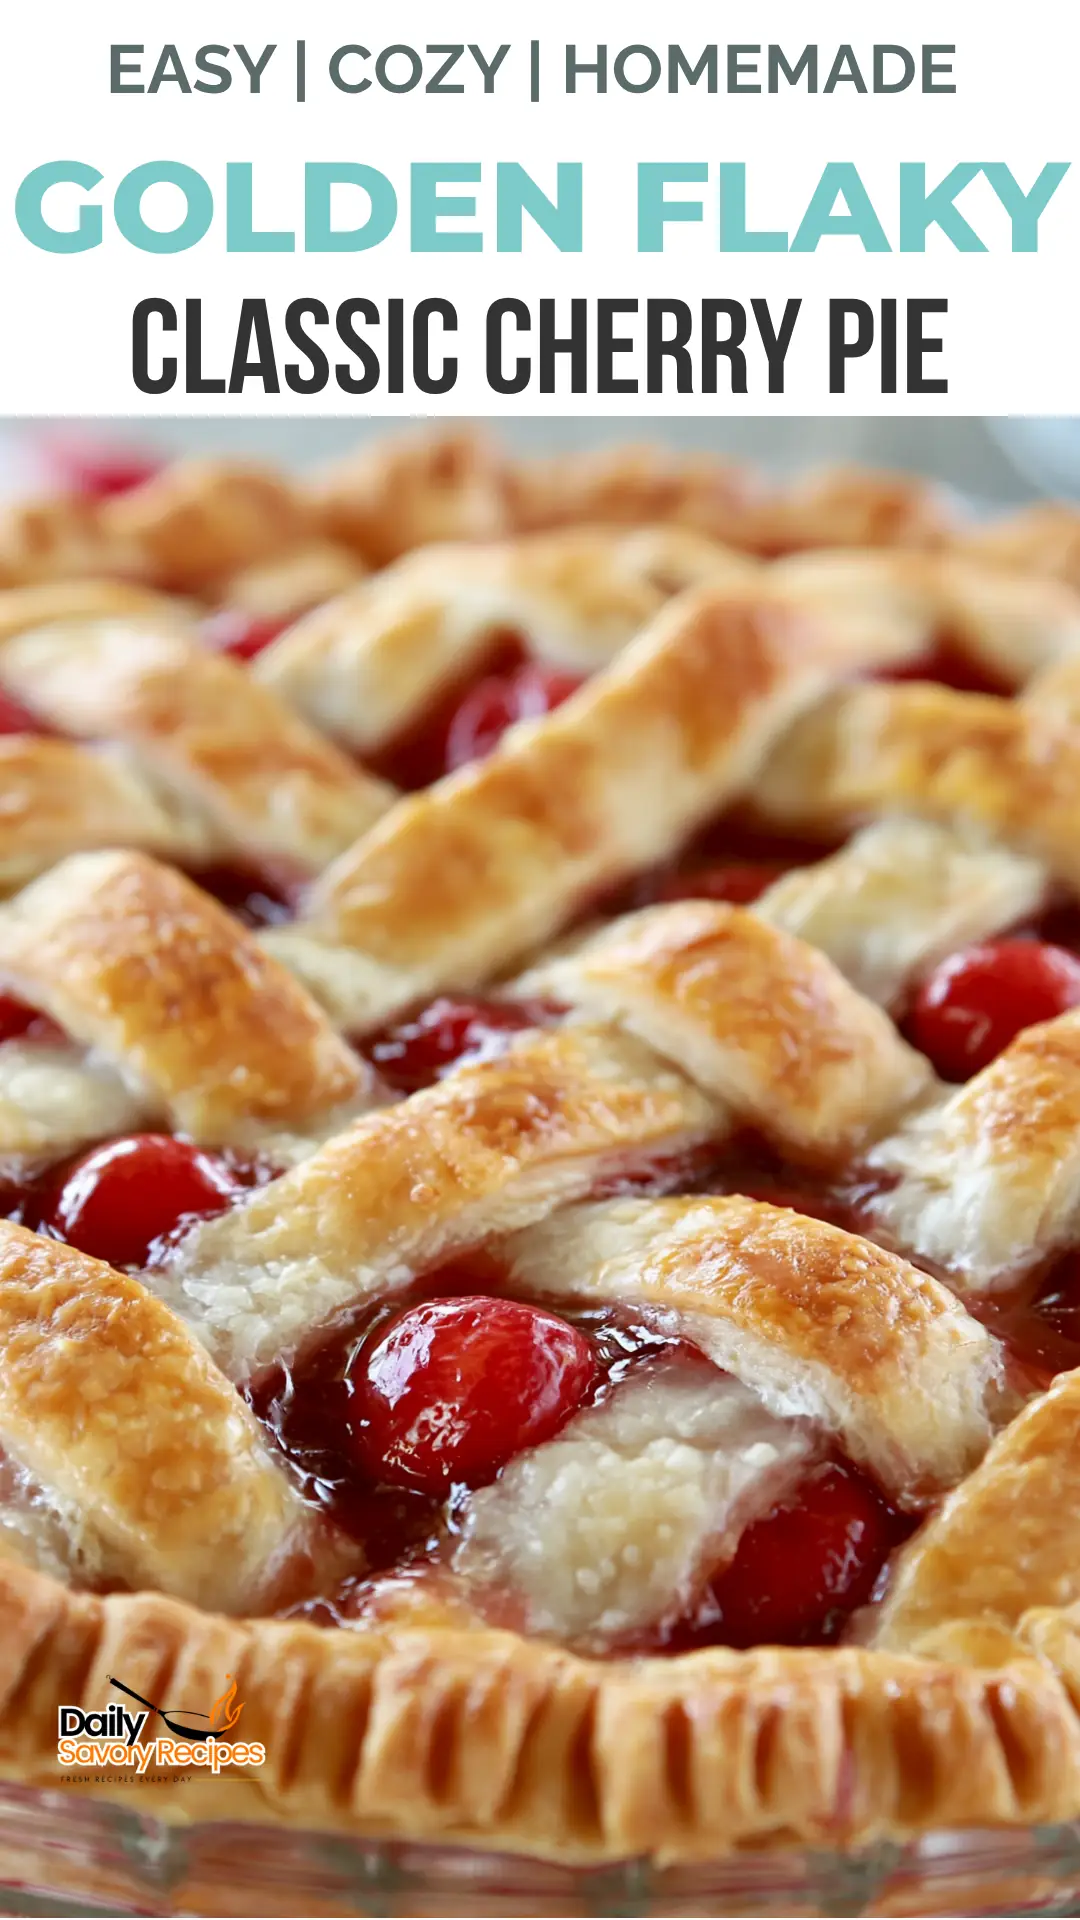
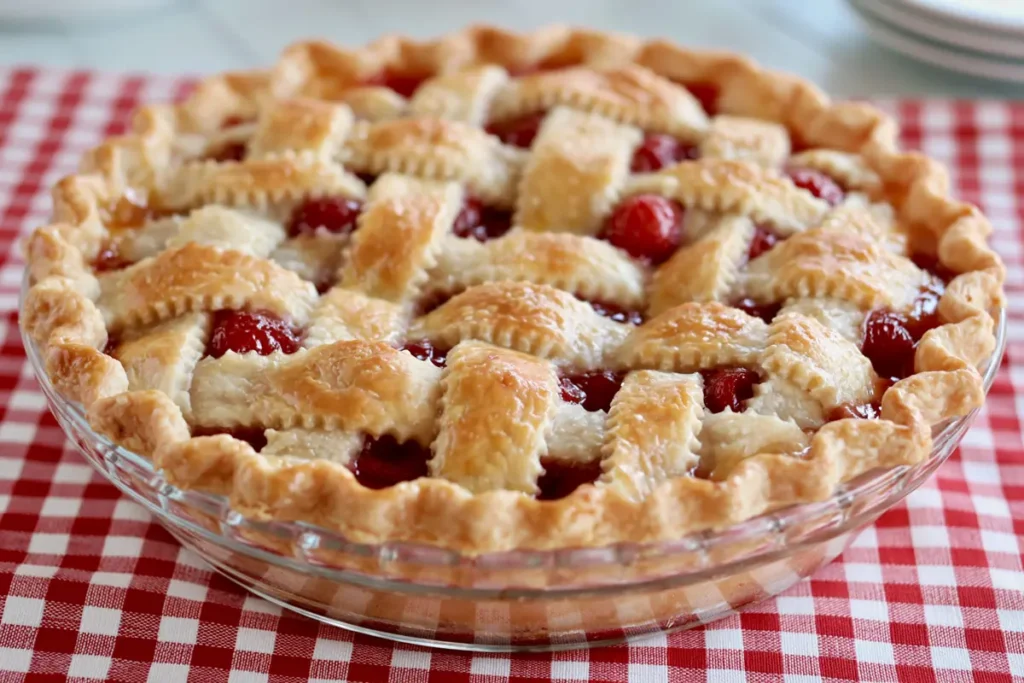
If you want the pie to look more decorative, a lattice crust works nicely with cherry filling because the dark red color peeks through the openings. It’s not difficult once you understand the weaving pattern, though colder dough makes the process much easier. Warm strips tear fast.
I usually tell newer bakers not to overthink lattice work. Slightly uneven strips still bake beautifully. Homemade pies should look homemade.
Finishing Touches Before the Pie Goes Into the Oven
A quick brush of milk over the top crust helps the surface brown evenly and gives the pie that bakery-style finish. You don’t need much. Too much liquid can pool around the edges and soften the dough instead of helping it crisp.
The sugar on top is mostly there for texture and appearance, but it does make a difference. As the pie bakes, the sugar lightly caramelizes and adds a delicate crunch against the flaky crust. Worth the extra minute.
Before the pie goes into the oven, check the edge seal one last time. Any open spots around the rim can leak filling during baking, especially once the cherries start bubbling.
Baking Classic Cherry Pie Without Burning the Crust
Start the pie in a fully preheated 425°F oven. That higher heat gives the bottom crust a chance to begin setting before the filling releases more moisture. If the oven runs cool, the crust can stay pale underneath even when the top looks finished.
After about 15 minutes, cover the outer edge with foil or a pie shield. You’re not trying to stop browning completely — just slowing it down. The center of the pie still needs another 25 to 30 minutes to fully bake and thicken.
Watch for three signs that the pie is done:
- The crust turns evenly golden
- The filling bubbles near the center, not just the edges
- The kitchen smells deeply toasted and fruity
That bubbling matters. If the center never bubbles, the filling may stay thinner after cooling.
Cooling Time Matters More Than Most People Think
Cutting cherry pie too early is probably the most common mistake people make. The filling needs time to settle and thicken as the temperature drops. Give it at least 1 hour before slicing. Two is even better if you want clean pieces.
Fresh from the oven, the filling looks loose and almost overly juicy. That’s normal. Once cooled, it firms up noticeably and holds its shape much better on the plate.
Leftovers keep well covered at room temperature for about a day, or refrigerated for several days after that. I usually warm slices for about 10 minutes in a 300°F oven instead of microwaving them. The crust stays crisp that way.
Frequently Asked Questions
Can You Use Frozen Cherries?
Yes, though they release more liquid as they thaw. If you decide to swap out canned filling for frozen cherries, you’ll usually need additional sugar and a thickener like cornstarch to keep the filling from becoming watery.
Do You Need to Pre-Bake the Bottom Crust?
Not for this version. Starting the pie at a higher oven temperature helps the bottom crust cook properly without blind baking first. A metal pie plate can also help crisp the bottom faster than glass.
Can This Be Made as Mini Pies?
Absolutely. Smaller pies bake faster, usually around 25 to 30 minutes depending on size. Keep an eye on the crust color because the edges brown quickly.
How Do You Reduce Sweetness?
A smaller amount of almond extract helps balance sweetness without changing the texture. Tart cherry filling also gives the pie a cleaner flavor than very sweet varieties.
A Pie Worth Making More Than Once
Classic Cherry Pie doesn’t need complicated techniques or long ingredient lists to feel homemade. The combination of flaky crust, warm cherries, and that hint of almond does most of the work on its own.
This is one of those desserts that fits just as comfortably on a holiday table as it does on a quiet weekend afternoon. Every recipe I share is an invitation from my kitchen to yours.
Classic Cherry Pie
Ingredients
Method
- Preheat the oven to 425°F.
- Place one pie crust into a deep dish pie plate and press it gently into the bottom and sides of the dish.
- Spoon the cherry pie filling into the crust, add the almond extract, and stir gently until evenly mixed. Smooth the filling with a spatula.
- Lay the second pie crust on a cutting board and make four small cutouts or several slits to allow steam to escape during baking.
- Place the second crust over the filling, press the edges of the top and bottom crusts together, trim any excess dough, and crimp the edges as desired.
- Brush the top crust lightly with milk and sprinkle with sugar.
- Bake for 40 to 45 minutes, covering the outer crust edge with foil or a pie shield after the first 15 minutes to prevent over-browning.
- Remove the pie from the oven when the crust is golden and the filling is bubbling near the center.
- Cool for at least 1 hour before slicing so the filling can set properly.
Notes
- For a more decorative pie, cut the top crust into strips and weave a lattice over the filling.
- If the crust edges brown too quickly, cover them with aluminum foil or a pie shield after the first 15 minutes.
- Cool the pie for 1 to 2 hours for cleaner slices.
- For best texture, reheat leftover slices in a 300°F oven for about 10 minutes instead of microwaving.